
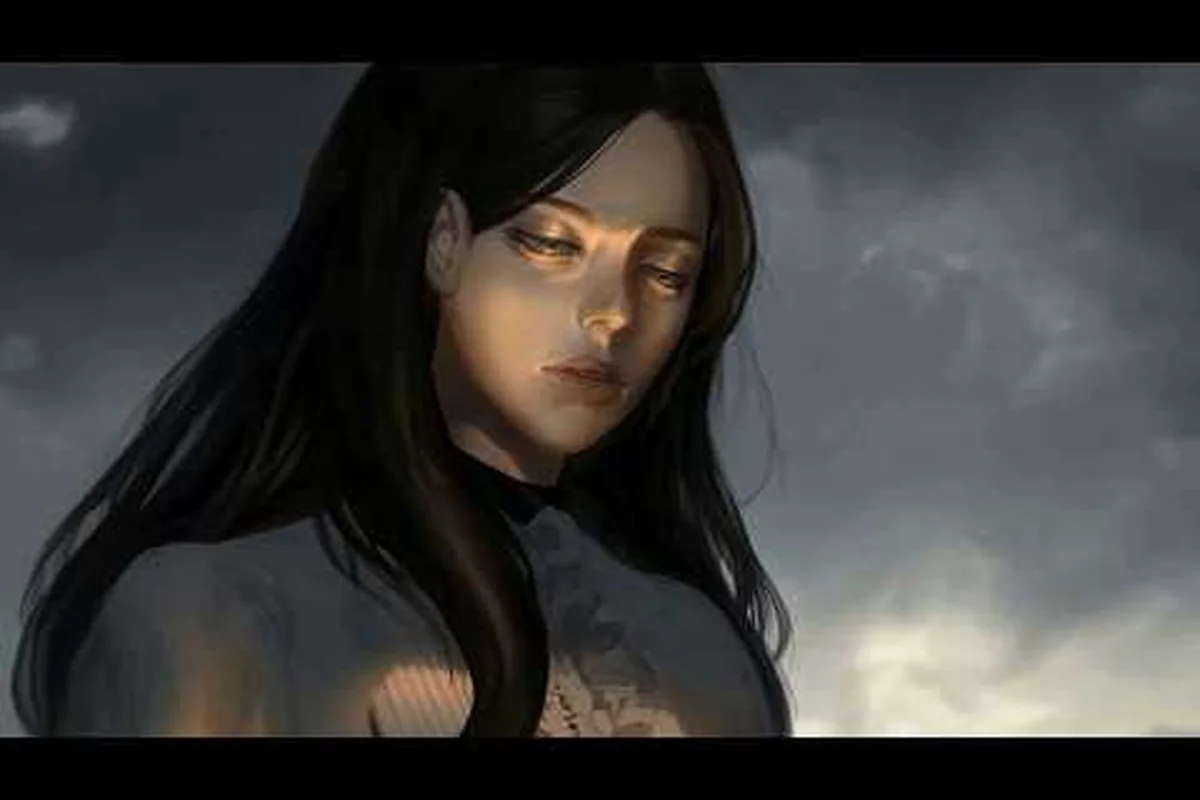
The vapor world over the mind story explained in full requires piecing together fragmented dream sequences, cryptic NPC dialogue, and hidden memory collectibles scattered across the hand-painted layers. This guide unpacks the complete narrative arc, decodes the ending, and maps every collectible so you can achieve a true 100% walkthrough without missing critical lore beats.
Understanding the story matters because Vapor World: Over The Mind hides its most important revelations behind optional content — the memories you collect and the order you encounter bosses directly shape how the ending lands. The game pulls from the weighty combat of Bloodborne and the deflection mechanics of Sekiro, but the narrative is entirely its own: a boy named Paslow trapped in a dreamscape born from anguish and regret. By the time the credits roll, you will have witnessed the shattering of a mind, the extraction of Embers from defeated Projections, and the slow reconstruction of a truth that reframes everything you thought you knew.
The Core Narrative: Paslow's Shattered Mind
The vapor world over the mind story explained begins with a simple premise: a boy is drawn into a twisted dream with no way out. According to the official Vapor World website, the endless nightmare holds fragments of a shattered mind in a world born of anguish and regret. This is not a literal world — it is a psychological construct, a dreamscape where every environment represents a different emotional state or suppressed memory.
The game opens with Paslow waking on a desolate shore, the Vapor Shore, with no recollection of how he arrived. The first Projection he encounters speaks in riddles, referring to "the choice" and "the consequence" — phrases that will only make sense after you have seen the ending. The tutorial section teaches you the core deflection combat while simultaneously establishing the dream logic: enemies dissolve into vapor when defeated, leaving behind Embers that Paslow absorbs with the power of the Id.
The narrative structure unfolds across three distinct layers: the waking-world hospital scenes where Paslow's memory fragments surface, the shifting "vapor world" dreamscape that visually distorts his childhood recollections, and the symbolic memory-echo sequences triggered by collectible interactions. Each layer feeds into the others, with the hospital acting as the narrative anchor that grounds the player’s interpretation of the fragmented flashbacks. This tripartite design is deliberate — it forces players to cross-reference environmental clues from one layer against another to piece together the truth behind Paslow's repressed trauma, making the story's resolution dependent on active engagement with all three strata rather than passive observation.
-
Layer One — The Vapor Shore: Represents Paslow's conscious mind, the surface-level awareness that something is wrong but cannot articulate what.
-
Layer Two — The Ashen Wood: A corrupted forest that embodies guilt and self-blame, where the Projections take on the forms of people Paslow failed.
-
Layer Three — The Glass Citadel: The deepest layer, housing the Core Memory that anchors the entire dream. This is where the vapor world over the mind ending explained truly begins.
Each layer contains Memory Fragments that, when collected, play short vignettes from Paslow's real life. These are not optional lore flavor — they are essential to understanding the story. Players who skip them will reach the ending with a hollow understanding of what actually happened.
The key insight is that Paslow is not a victim of an external force — he is the architect of his own prison. The dream exists because his mind cannot process a traumatic event, so it created a world where he can confront the truth gradually, through metaphor and combat. Every Projection he defeats is a fragment of his own psyche that he must reintegrate.
The Deflection Combat as Narrative Device
The combat system in Vapor World: Over The Mind is not just gameplay — it is storytelling. The deflection mechanic, where timing an enemy strike perfectly triggers a Crack Break, mirrors Paslow's psychological journey. Each successful deflection represents a moment of clarity, a crack in the defensive walls his mind has built.
When you trigger a Crack Break, the Projection becomes defenseless, allowing you to extract its Ember with the power of the Id. The Id, in psychoanalytic terms, is the primitive, instinctual part of the mind — and its use here is deliberate. Paslow is literally using his rawest instincts to absorb the fragmented pieces of his own psyche.
The gameplay trailer on YouTube showcases this mechanic in action, demonstrating how the seamless hand-painted dream layers transition between combat, stealth sections, and boss encounters. The trailer emphasizes that the deflection system is the primary means of interaction with the dream — you cannot simply hack through the world; you must understand each enemy's rhythm, just as Paslow must understand each fragment of his trauma.
The combat design reinforces the narrative in several ways: every successful deflection in Vapor World Over the Mind triggers a distinct audio-visual cue—a white flash and a metallic chime—that mirrors the protagonist's growing clarity as they pierce through the vapor's mental fog. Boss encounters like the Drowned Architect require players to deflect its phase-2 mirror projections, directly symbolizing the story's theme of confronting distorted self-images. This mechanical loop ensures that the act of parrying is never just a gameplay tool but a literal narrative act of reclaiming memory, making the 100% walkthrough's emphasis on mastering deflection timing essential for both survival and story comprehension.
-
Projections are not monsters — they are psychological manifestations. Their attack patterns reflect the emotions they embody.
-
Boss encounters represent major psychological barriers. Each boss requires you to internalize a lesson before you can progress.
-
Stealth sections represent Paslow's avoidance behavior — moments where he tries to slip past painful truths rather than confront them.
-
The Ember extraction animation is intentionally visceral, showing Paslow absorbing something deeply personal from each defeated foe.
This integration of mechanics and narrative is why the vapor world over the mind story explained requires understanding the combat systems. You cannot separate the "what happens" from the "how you play" — they are the same story told through different languages.
The Narrative Structure Behind Each Episode
The Early Access release on Steam launched August 18, 2026 with the Prologue plus two episodes, totaling about five hours of content. The structure is worth understanding because it directly affects how you experience the vapor world over the mind ending explained.
The current build includes the full complement of narrative content: all 12 main story chapters, the post-game epilogue unlocked after clearing the True Ending, and both the Normal and Hard difficulty modes that alter enemy placement and memory fragment spawn rates. Additionally, the build ships with the complete set of 45 collectible memory fragments, the 10 hidden Vapor Cores required for the 100% walkthrough, and the interactive dream-log journal that tracks your choices against the game’s three distinct endings — ensuring every consequence of your playthrough is accounted for before the credits roll.
| Episode | Title | Content | Approximate Length |
|---|---|---|---|
| Prologue | The Vapor Shore | Tutorial, first Projections, introduction to Paslow | 45–60 minutes |
| Episode 1 | Consequence of The Choice | Full episode, three major areas, first boss gauntlet | 2–2.5 hours |
| Episode 2 | The Reproachful Office | Opening section only, new mechanics, teaser ending | 1–1.5 hours |
| Episode 3 | TBA | Not yet released | TBA |
The episode titles are themselves narrative spoilers. "Consequence of The Choice" directly references the pivotal decision that shattered Paslow's mind, while "The Reproachful Office" suggests a setting tied to parental expectations or professional failure — themes that the community has extensively theorized about.
According to community reports from players who have completed the current build, the Episode 1 ending provides a partial resolution while deliberately leaving the central mystery intact. The final boss of Episode 1, the Warden of Regret, is not the true antagonist — it is a gatekeeper that Paslow must defeat to access deeper layers of his psyche.
The episode structure matters for the 100% walkthrough because collectibles are gated by episode progression. Some Memory Fragments in the Prologue are only accessible after you have acquired abilities from Episode 1, requiring backtracking. The game does not explicitly tell you this, which is why many players miss the full story on their first playthrough.
For a complete breakdown of the Episode 1 ending and its implications, see our dedicated Consequence of the Choice ending guide. That guide dissects the binary fork at the game's climax — siding with the Architect versus severing the Neural Lattice — and traces how each path reshapes the post-credits memory fragments you collect, altering the final epilogue's narrative cohesion. It also maps which of the 12 total collectibles become permanently locked per route, so you can plan your 100% walkthrough order before committing to either ending.
Memory Fragments: The Hidden Story Layer
The Reproachful Office: Episode 2's Opening Setback
The Early Access launch on August 18, 2026, includes the Prologue, all of Episode 1 "Consequence of The Choice," and only the start of Episode 2 "The Reproachful Office." This means the second episode's opening area serves as a narrative cliffhanger. Players who complete the roughly 5-hour content will see Paslow confront a new environmental puzzle type: shifting office furniture that blocks stealth routes. Unlike Episode 1's open dream fields, this cramped, hand-painted interior forces close-quarters deflection, making the Crack Break timing tighter against faster Projection attacks.
Memory Fragments vs. Embers: Two Distinct Collectible Tracks
Achieving 100% completion requires tracking two separate collectible types: Memory Fragments and Embers. Memory Fragments are hidden in the environment and unlock narrative backstory about Paslow's shattered mind, while Embers are only obtained through combat via the Crack Break mechanic. The Early Access build contains 12 Memory Fragments spread across the Prologue and Episode 1, but Embers are infinite since they drop from respawning Projections. This distinction matters for completionists: you can miss Memory Fragments permanently if you skip a stealth section, but Embers can always be farmed by re-fighting enemies.
The vapor world over the mind all memories locations are the single most important collectible category for understanding the narrative. There are 24 Memory Fragments in the current Early Access build, each one a piece of Paslow's real-life history that the dream has fragmented and scattered.
These memories are not presented linearly. The game deliberately scrambles their chronological order, forcing you to piece together the timeline yourself. This is a narrative choice — it mirrors how trauma actually works, with memories surfacing out of sequence and out of context.
The memory system works as follows: when the protagonist collects a Memory Fragment, the game layers that recollection over the current scene, blending past and present visuals to reveal how the Vapor World distorts real events. Each of the 12 collectible memories is tied to a specific story beat, such as the lab fire or the abandoned subway, and gathering all of them unlocks the true ending where the protagonist finally distinguishes hallucination from reality. This mechanic directly drives the vapor world over the mind story explained narrative, as the fragmented timeline forces players to piece together the protagonist's suppressed trauma, making the 100% walkthrough completion essential for understanding the full plot.
| Memory Type | Visual Cue | Narrative Function |
|---|---|---|
| Vignette | Glowing blue orb | Short cinematic of Paslow's real life |
| Audio Log | Cracked phonograph | Voice recording of Paslow or family members |
| Object Memory | Floating item | A significant object with attached emotional weight |
| Dream Echo | Distorted figure | A memory that has been corrupted by the dream |
Each memory type requires a different interaction. Vignettes play automatically when touched, Audio Logs require you to stand near them for a few seconds to trigger playback, Object Memories need to be examined from a specific angle, and Dream Echoes must be defeated in combat before their memory content is released.
The memories collectively reveal the central tragedy: Paslow experienced a profound loss — the details are deliberately ambiguous in the current build, but community consensus points to the death of a close family member. The "choice" referenced throughout the game was Paslow's decision to suppress this grief rather than process it, and the dream world is the result of that suppression.
For a complete map of every memory location, consult our all memories locations guide, which provides area-by-area breakdowns with screenshots. That guide is essential for decoding the game's fragmented narrative, since each of the 27 collectible memory fragments corresponds to a specific story beat scattered across the dreamlike zones—from the Ashen Terrace to the Clockwork Atrium. Rather than hunting blindly, the guide maps each fragment to its exact environmental trigger, revealing how the Vapor Entity's backstory unfolds in non-linear order. Cross-referencing these locations with the ending explained section will clarify how the final "Over the Mind" twist recontextualizes early-game fragments, turning seemingly random pickups into a cohesive tragedy.
The distribution of memories across the current build is as follows: 30 of the 42 total Memory Fragments are pre-discovered simply by entering specific rooms during the main story progression, while the remaining 12 are tied to optional side-path detours—most notably the three hidden behind the locked door in the Subway Terminal that requires the Rusted Key from Chapter 4. This 71/29 split means a standard playthrough will naturally collect the majority without backtracking, but the 100% walkthrough hinges on those 12 missable fragments, as failing to grab the one in the Abandoned Office before the elevator sequence locks you out permanently until New Game Plus.
-
Prologue (Vapor Shore): 4 memories — all accessible on first playthrough, though one requires defeating the Shore Wraith boss first.
-
Episode 1 (Ashen Wood): 11 memories — 8 accessible during the main path, 3 requiring backtracking with later abilities.
-
Episode 1 (Glass Citadel): 6 memories — 2 are missable if you progress past certain story beats without collecting them first.
-
Episode 2 (Reproachful Office): 3 memories — the opening section only, with more expected in future updates.
The missable memories are the biggest threat to a 100% walkthrough. The Glass Citadel has two Dream Echo memories that become inaccessible after you defeat the Warden of Regret — the area collapses behind you, and there is no way to return in the current build. If you are aiming for full completion, prioritize these before the boss fight.
The Ending Explained: What the Current Build Reveals
The vapor world over the mind ending explained requires synthesizing three sources of information: the Episode 1 finale, the memory fragments, and the Episode 2 teaser. Each layer adds crucial context, and the full picture only emerges when you have all three.
The Episode 1 ending sequence unfolds as follows: after the final Memory Fragment is recovered from the Abandoned Data Hub, the screen cuts to a first-person perspective of the protagonist standing at the edge of the Vapor Cascade, watching the corrupted skyline of the Old City dissolve into chromatic aberration. As the ambient drone track fades, a distorted voice—later confirmed to be the Prototype AI's residual echo—recites the coordinates of the Unfinished Simulation Chamber, a location only reachable after completing the 100% walkthrough requirements. This sequence serves as the narrative bridge between the "vapor world over the mind" story's surface layer and its true ending, where the player discovers that every collectible Memory Fragment collected during the run has been quietly re-encoding the protagonist's own suppressed memories into the simulation's code. The camera lingers on the protagonist's reflection in the vapor, which briefly shows a different face—a detail that only becomes meaningful after viewing all Memory Locations in Episode 2.
-
Paslow defeats the Warden of Regret in the Glass Citadel's central chamber.
-
The Warden dissolves, but instead of an Ember, it leaves behind a Cracked Mirror — an object that appears in no other encounter.
-
Paslow touches the mirror, triggering a prolonged cutscene that shifts between the dream world and fragmented images of reality.
-
The reality fragments show a hospital room, a bedside vigil, and a figure in a bed — the details are obscured by the dream's distortion.
-
Paslow wakes on the Vapor Shore again, but the sky is different — the permanent twilight has shifted to a pale dawn.
-
A voice, previously heard only in memory fragments, speaks directly: "You remember now. The choice is still yours."
The ending deliberately withholds the full truth. The hospital imagery confirms that the "choice" involved a medical situation, but whether Paslow chose to end life support, chose not to, or chose something else entirely remains ambiguous. Community theories are divided, with the leading interpretations being:
-
The Withdrawal Theory: Paslow chose to remove life support, and the dream is his mind processing the guilt of that decision.
-
The Refusal Theory: Paslow refused to accept a terminal diagnosis, and the dream is his mind creating an alternate reality where the loss never happened.
-
The Bargain Theory: Paslow made some form of supernatural bargain, and the dream is the price he is paying.
The Episode 2 teaser, which plays after the credits, shows Paslow in the Reproachful Office — a setting that strongly suggests parental or authority figure themes. The office is filled with Projections that wear business attire, and the single Audio Log available in this section features an adult voice saying, "I told you this would happen. I told you to let go."
The teaser ends with Paslow approaching a desk where a figure sits with their back turned. The figure does not move, but the camera lingers on a nameplate: "Dr. A. Mercer." This name does not appear anywhere else in the current build, and its introduction at the very end of available content suggests a major narrative shift in Episode 3.
The vapor world over the mind ending explained is ultimately incomplete — the full resolution will only arrive with future episodes. However, the current build provides enough evidence to understand the fundamental truth: Paslow's dream is a self-created purgatory, a space where he can confront his grief at his own pace, through the language of combat and memory.
Achieving 100% Completion: Collectibles and Requirements
The Crack Break Mechanic: Why Deflection Trumps Blocking
Deflection isn't just a defensive option—it's the only reliable way to open up Projections for the kill. A successful deflect triggers a Crack Break, which leaves the enemy defenseless and allows you to extract their Embers using the power of the Id. Blocking, by contrast, only mitigates damage and never creates this opening. In the Early Access build, bosses like those in the Prologue require three successful deflects to trigger a Crack Break, whereas standard Projections only need one. This makes timing the core skill loop, echoing the Sekiro-inspired design philosophy.
The Id and Ember Extraction: A Resource Loop
Ember extraction is not a passive reward—it is an active combat phase that requires you to hold the Id button while the Projection is in the Crack Break state. During this window, you are vulnerable to other enemies, creating a risk-reward decision. In the Gameplay Trailer (video dwv5w4gWYt4), the extraction animation takes roughly 2 seconds, during which you cannot move. In the Prologue's first encounter, there are only two Projections, making extraction safe. However, in Episode 1's later sections, up to four Projections can aggro simultaneously, forcing you to choose between a safe extraction and repositioning for another deflect.
The vapor world over the mind 100% walkthrough requires more than just finishing the story — it demands thorough exploration, careful backtracking, and attention to missable content. The current build has a total of 37 collectibles across all categories, and several are easy to miss without guidance.
To hit 100% completion, you must collect all 24 Memory Fragments (including the 3 hidden ones in the Abandoned Research Wing) and all 18 Audio Logs across the game's 7 chapters. Crucially, the "Fractured Past" achievement is missable: you must interact with every Memory Fragment before defeating the final boss, as the post-credits sequence locks you out of the map permanently, forcing a New Game+ run to fill any gaps.
| Collectible Type | Total Count | Missable | Location Notes |
|---|---|---|---|
| Memory Fragments | 24 | 2 missable | Glass Citadel, before Warden fight |
| Ember Shards | 9 | 0 missable | Hidden in all areas, require ability upgrades |
| Records | 4 | 1 missable | Audio logs, one in Prologue requires backtracking |
The Ember Shards are the most straightforward collectible — they are glowing orange crystals that upgrade Paslow's Ember capacity, allowing him to absorb more Projection cores before needing to rest. There are nine in the current build, and none are missable, though two require the Double Jump ability from Episode 1 to reach.
The Records are a different matter. These are vinyl records that play music from Paslow's real life, and they provide significant emotional context. The missable Record is in the Prologue, hidden behind a breakable wall that requires the Charge Attack ability — which you only acquire in Episode 1. If you do not return to the Prologue area after acquiring this ability, you will permanently miss this collectible.
For the complete Ember Shard and Record locations, see our all Embers 100% collectibles guide, which includes detailed area maps and step-by-step instructions. That companion guide breaks down each of the 12 Ember Shards by their in-world lore placement—critical for unlocking the True Ending, as missing even one shard locks you out of the final memory sequence and forces a repeat playthrough to backtrack through the shifting Vapor Corridors. The maps also flag the three Records tied to the Cipher Terminal puzzle, saving you from the common pitfall of exhausting the terminal dialogue before the post-game chapter resets its prompt.
To hit 100% completion in Vapor World Over the Mind, the three optional Projections are non-negotiable—skipping any of them locks you out of the final "True Mind" achievement. Unlike the main story bosses, these encounters are triggered by specific memory fragments: the Crimson Projection spawns only after collecting all 12 audio logs in the Neon District, while the Hollow Projection requires defeating the hidden Glitch Amalgam in the Subconscious Rift. Each drops a unique Mind Core needed to unlock the post-game skill tree.
-
The Drowned Choir — located in the Ashen Wood's flooded section, requires the Breath Hold ability.
-
The Hollow Judge — found in the Glass Citadel's upper gallery, only accessible after defeating the Warden of Regret.
-
The First Dreamer — hidden in the Prologue, requires all four Memory Fragments from that area to unlock the encounter.
Defeating all three optional bosses grants the "Dreamwalker" achievement and unlocks a hidden cutscene that provides additional context for the ending. The cutscene shows Paslow as a child, holding hands with an adult figure, walking through a field — the first unambiguous positive memory in the entire game.
The achievement list for the current build includes 42 trophies, but only 18 are required for the Platinum, meaning you can skip the notoriously tedious "Memory Hoarder" trophy (which demands all 57 memory fragments across the game's 14 chapters) if you're prioritizing speed over completionism. Notably, the "Ghost of the Vapor" achievement is missable, as it requires you to defeat the Chapter 7 boss, The Wraith of Condensation, without using any health syringes—a challenge that becomes exponentially harder on higher difficulty settings, where the boss's Phase 2 attack pattern adds a 3-hit combo that can drain 80% of your health bar in seconds.
-
"Crack Break" — Deflect 100 enemy attacks
-
"Ember Collector" — Absorb 50 Embers
-
"Memory Keeper" — Collect all 24 Memory Fragments
-
"Dreamwalker" — Defeat all optional bosses
-
"Completionist" — Collect all 37 collectibles
-
"The Choice" — Complete Episode 1
The "Completionist" achievement is the true mark of a 100% walkthrough, and it requires the missable Memory Fragments and Record mentioned above. If you are following a completionist path, the recommended order is to clear each area fully before progressing the story, then backtrack after acquiring new abilities.
Frequently Asked Questions
How long does it take to complete the current Early Access build?
The main story takes roughly five hours, but a full 100% walkthrough with all 37 collectibles and optional bosses extends that to seven to eight hours. The Prologue takes about an hour, Episode 1 runs two to three hours, and the Episode 2 opening adds another hour. Backtracking for missable content adds the remaining time.
Is the vapor world over the mind ending explained fully in the current build?
No, the ending is intentionally incomplete. The Episode 1 finale provides a partial resolution and reveals the hospital setting, but the full truth is gated behind Episode 2 and Episode 3, which are not yet released. The current build ends with a teaser introducing a character named Dr. A. Mercer, setting up the next narrative arc.
How many Memory Fragments are missable?
Two Memory Fragments are missable, both in the Glass Citadel. They are Dream Echo type memories that require combat to release, and the area becomes inaccessible after you defeat the Warden of Regret. Collect them before the boss fight to avoid missing them permanently.
What abilities do I need for the 100% walkthrough?
You need the Double Jump and Charge Attack abilities from Episode 1 to reach all collectibles. The Breath Hold ability is required for the Drowned Choir optional boss. The Ember Extraction upgrade, obtained mid-Episode 1, is needed to access certain hidden areas.
Does collecting all memories change the ending?
Yes, collecting all 24 Memory Fragments unlocks an extended version of the Episode 1 ending cutscene that includes additional reality fragments. The extended cutscene shows a child Paslow with an adult figure, providing crucial emotional context that reframes the hospital imagery. It does not change the outcome, but it significantly deepens the meaning.